How to Get Roomba to Map a New Room
- Mar 28
- 8 min read
You bought a robot vacuum to save time, yet you might be spending more energy rescuing it from the spare bedroom than it actually spends sweeping. Why does your Roomba keep ignoring the one new addition you actually want it to clean? The answer usually lies in how the machine perceives your home, and fixing this frustrating cycle requires teaching your robot exactly where that new space is located.
Treat your device like a first-time guest in your home who needs a proper tour before they can navigate the hallways on their own. By utilizing the Imprint Smart Mapping feature within your app, you are essentially helping the robot draw a reliable digital floor plan. In practice, this technology handles the complex robot vacuum floor plan calibration behind the scenes, ensuring your machine knows exactly where the living room ends and the kitchen begins.
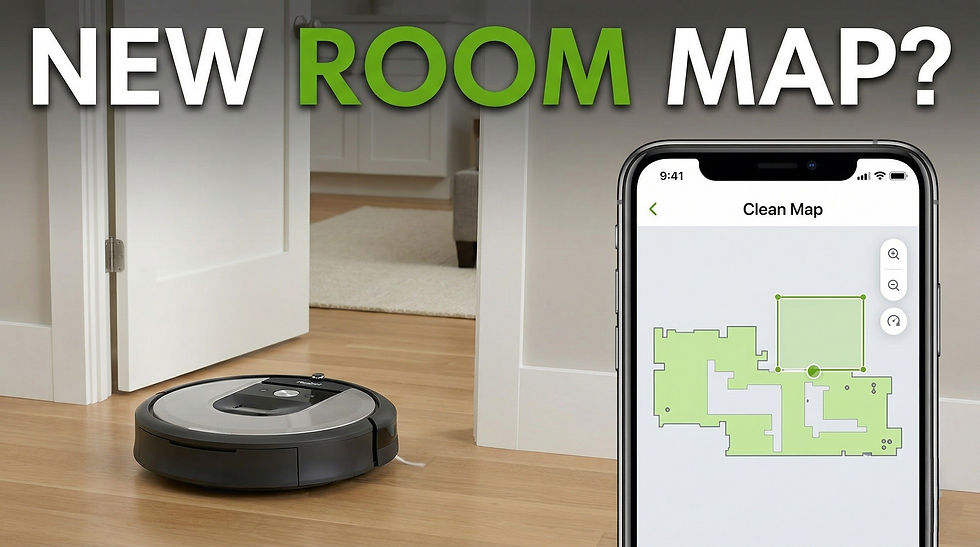
Mastering how to get roomba to map a new room comes down to recognizing the difference between a standard sweep and a dedicated Mapping Run. During this specialized observation mode, the motor runs quietly so the machine can focus entirely on recognizing physical boundaries rather than picking up every stray crumb. iRobot data reveals that it typically takes two to three passes for these Smart Maps to reach complete accuracy, ultimately giving you the confidence to command a targeted room cleanup with a single tap.
Preparing Your Home for a Perfect Map: The 'Toddler-Proofing' Phase
Before your robot can save you time, it needs a clear view of its new territory. Since your Roomba relies on built-in sensors to "see" the floorplan, everyday clutter can accidentally create "phantom walls." For example, floor-length curtains pooling on the rug tell the robot’s digital map that a solid, impassable barrier exists. Overcoming mapping obstacles means realizing your robot believes whatever its sensors detect on day one.
Getting the space ready is like toddler-proofing your home; you must remove anything that creates a "navigation trap." A stray phone charger or throw rug fringe can quickly tangle the wheels, leaving your robot stranded and its map unfinished. When training a Roomba to navigate complex layouts, complete this quick physical prep checklist before the robot leaves its dock:
Pick up loose cords, shoes, and stray laundry.
Tuck long rug tassels underneath the carpet.
Prop open all interior doors to reveal every corner.
Once the floor is clear and brightly lit, your home is physically ready for its new digital surveyor. However, simply pressing the standard vacuum button isn't the best way for it to learn this freshly prepped floorplan. A dedicated mapping run is much more effective.
Mapping vs. Cleaning: Why You Should Use 'Mapping Runs' for New Areas
Many assume the easiest way to teach their robot a floorplan is to just let it vacuum. However, a standard cleaning cycle focuses on dirt, not drawing boundaries. To map a space quickly, use a dedicated Mapping Run. Think of this as "Observation Mode." Instead of hunting for crumbs, your Roomba acts like a scout cruising around your furniture simply to sketch the room.
Since it isn't actively sweeping, the robot moves faster and quieter. Disabling the heavy vacuum motor uses much less power, perfectly satisfying Roomba mapping run battery requirements. Your robot can now explore significantly more square footage on a single charge. This efficiency ensures it has enough reserve power to easily return to its home dock, which is strictly required for the digital map data to actually save to your account.
Sending your vacuum on this fast-paced scouting mission saves you hours of waiting. It is the absolute best way to guarantee a perfect digital map on your very first attempt. With your physical space clear and Observation Mode understood, starting a mapping run from your smartphone takes just a few taps.
Step-by-Step: Triggering a Mapping Run in the iRobot Home App
Navigating the interface is straightforward once your robot is resting on its dock. You are now ready to generate your iRobot Home App Smart Maps. Learning how to trigger a mapping run takes just four quick taps:
Open the app and tap the "Map" icon.
Select the option to add or edit a layout.
Choose "Mapping Run" to keep the vacuum motor disabled.
Press "Start" to begin the house tour.
Perhaps you recently opened a previously closed door and need to teach your vacuum about the new room. Fortunately, updating existing floor plans never requires deleting your current layout to start over. Simply use the exact steps above to send the robot out. It will seamlessly recognize familiar hallways and smoothly attach the newly discovered room directly to your saved map.
As your device embarks on this digital sketching process, it relies heavily on its camera to navigate. Making sure it can clearly "see" your walls and doorways ensures a perfectly accurate floor plan on the first try.
Optimizing Home Lighting and Landmarks for Better Navigation
Much like a guest navigating a strange house at midnight, your robot struggles in the dark. Since it relies on a top-facing camera to process visual data—a navigation technology called VSLAM—optimizing home lighting for Roomba mapping is absolutely essential. When starting a mapping routine for a new room, simply turn on your overhead lamps and open the blinds to provide bright, even illumination across the entire floor plan.
As it moves, the camera lens constantly scans upward to pinpoint permanent visual anchors known as landmarks. These are distinct, high-contrast shapes your vacuum naturally memorizes, like the edge of a ceiling fan, a bright window frame, or the top of a tall bookshelf. By tracking how these ceiling-level details shift as it drives, the robot accurately calculates its exact position in your home.
Sudden shadows or flipped switches can hide these crucial cues, triggering a "relocalization" process where the robot spins in a confused circle to re-check its familiar landmarks. Keeping lights brightly consistent prevents this disorientation entirely, solving the trickiest part of identifying sensor navigation issues before they ruin your digital map.
What to Do While Your Roomba Explores (Hint: Don’t Help Too Much)
It is incredibly tempting to rescue your robot when it starts performing the "Circle of Death"—that bizarre dance where it spins repeatedly in the middle of the rug. Resist this urge during a mapping session. Unless the device is physically wedged under a sofa or actively eating a shoelace, it isn't actually stuck. It is simply pausing to process those visual landmarks. Manually picking the vacuum up completely shatters its internal sense of direction, immediately corrupting the digital map it just worked so hard to build.
Instead of hovering, let the vacuum complete its "homing" sequence independently. The robot must successfully drive itself back to the charging dock entirely on its own to lock in the robot vacuum floor plan calibration data. If you carry it to the base station yourself, the new map will not save. Just let it wander, bump, and eventually park itself. Once you hear the satisfying chime of a successful docking, you are ready to move on to refining your digital home by labeling rooms and creating clean zones.
Refining Your Digital Home: Labeling Rooms and Creating Clean Zones
Now that your robot is resting on its dock, open your app to view the raw digital floor plan. The software often guesses boundary lines, so use the Split and Merge tools to accurately define where the hallway ends and the living room begins. Learning how to label rooms in the iRobot app turns this basic sketch into a powerful smart home tool, particularly if you want to use voice commands:
Stick to simple, universal terms like "Kitchen" rather than "Food Prep Area."
Avoid similar-sounding names to prevent confusing your smart speakers like Alexa or Google Assistant.
Merge small, awkward hallways into adjacent larger rooms to create more efficient cleaning paths.
Beyond simple naming, the true magic happens when you explore advanced map customization features. Think of these tools as invisible digital fences that keep your vacuum out of trouble. A "Keep Out Zone" commands the robot to avoid notorious household traps, like a messy tangle of computer cords or delicate pet water dishes.
Mastering these boundaries stops daily vacuuming frustrations before they even start. For instance, creating custom cleaning zones allows you to send the device straight to a muddy entryway without running a full-house cycle. Your map is now beautifully optimized and ready for daily chores. However, if that fresh floor plan seems to be missing a space completely, specific troubleshooting steps can resolve the blind spots.
Troubleshooting: Why Your Roomba Won’t Discover the New Area
You mapped everything perfectly, so why won't Roomba find new area additions? Often, the robot literally cannot see the entrance. The vacuum relies on small infrared sensors to navigate safely through doorways. When everyday dust or pet hair covers these lenses, the robot assumes a clear opening is actually a solid wall. Wiping the front bumper and underside sensors with a dry microfiber cloth is the absolute quickest way to start identifying Roomba sensor navigation issues.
Beyond dirty lenses, an invisible barrier like a Wi-Fi dead zone might be blocking its progress. The robot constantly communicates with your home router to upload its digital floor plan. If the signal drops in a distant hallway or basement, the vacuum cannot save the new spatial data. Test this by checking your smartphone's Wi-Fi connection in the troublesome room; if your phone drops to a single bar, your vacuum is losing connection too.
High floor thresholds can also trick the software into thinking a room is a dangerous cliff. Sometimes, despite fixing sensors and internet drops, the existing floor plan becomes too corrupted with conflicting data to adapt. At this point, you must decide if more troubleshooting is worthwhile, or if deleting and remapping entirely is the smartest move.
Updating or Deleting Maps: When to Start Fresh vs. Adding On
Every time your robot completes a cleaning run, it quietly updates its digital floor plan to account for small changes, like a moved dining chair. However, over months of minor adjustments, the floor plan can suffer from "map drift." This happens when tiny daily tweaks stack up until the digital layout becomes messy and inaccurate. If you just rearranged your living room or keep facing stubborn mapping obstacles and tips aren't working, relying on these gradual updates will only cause more confusion.
Moving to a new house or buying bulky furniture means it is time to start entirely from scratch. Deleting and remapping zones might feel like a setback, but opening the app to delete a hopelessly corrupted map is actually your fastest route to success. Giving your robot a clean slate prevents it from endlessly searching for a couch that no longer exists.
Your Roadmap to a Hands-Free Clean: Maintaining Your Smart Map
You no longer have to cross your fingers and hope your vacuum stumbles into the right space. By prepping your floors, adjusting the lighting, and launching a dedicated observation run, you have mastered how to get your Roomba to map a new room. Earning that satisfying "Map Complete" notification means your days of carrying the robot across the house are officially over.
To keep your Smart Maps highly accurate over time, treat the robot's hardware like a pair of glasses. Set a quick monthly reminder to gently wipe down the camera and bumper sensors so it never loses its visual landmarks. If you eventually rearrange your heavy furniture, a brief update run will seamlessly refresh the digital floor plan without requiring you to start from scratch.
With a precise, fully labeled map stored right in your pocket, the true convenience of a smart home is at your fingertips. The next time you drop crumbs in the kitchen or track dirt down the hallway, a single "One-Tap Clean" is all it takes to make the mess disappear automatically.


Comments